How to Install Chamberlain Belt Drive Garage Door Opener
- Check Door Balance and Clearance
- Assemble Rail and Belt System
- Install Header Bracket
- Mount Motor Unit
- Adjust Belt Tension
- Install Safety Sensors
Most users complete this in under 4 minutes
Overview
Chamberlain Chamberlain Belt Drive Garage Door Opener setup takes under 15 minutes for most users — if you're stuck, the steps below target the specific points where installs stall.
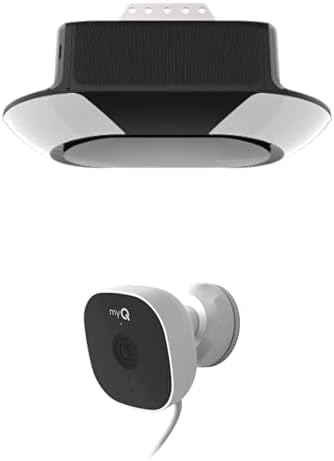
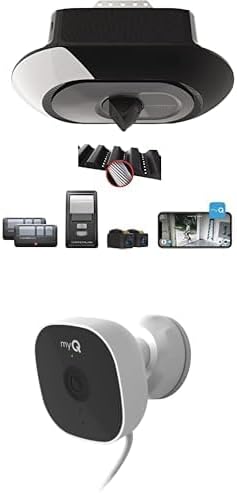
This guide covers the installation of the Chamberlain B2405 or B6765 belt drive garage door opener, including ceiling mounting, trolley assembly, rail attachment, and myQ WiFi configuration. Chamberlain belt drive openers are quieter than chain drive models and include myQ smart connectivity built in for smartphone control through the myQ app.
Why This Happens in Real Homes
Installing a Chamberlain belt drive opener (like the B2405 or B6765) follows the same sequence as any opener, with the payoff being a much quieter door — the rubber belt replaces the chain's metal-on-metal noise. The work starts on the wall: mount the header bracket solidly to structure directly above the door's high point, then hang the motor unit from the ceiling so the rail runs level and centered over the door, and attach the door arm to the bracket on the top door section.
Before you power it up, confirm the door itself is balanced (it should stay put when raised halfway by hand) — an unbalanced door strains any opener. Then set the up and down travel limits so the door stops fully open and exactly at the floor, adjust the force, and align the two photo-eye safety sensors near the base of the tracks until both LEDs glow solid, since the opener won't close without them. Finish by connecting myQ to your 2.4GHz WiFi in the app (it's 2.4GHz-only), which enables smartphone control, alerts, and optional Alexa or Google integration. Correct brackets, set limits, aligned sensors, and 2.4GHz WiFi give you a quiet, smart-connected door.
What's Included
- Installing a belt drive opener
- Rail/trolley assembly questions
- Ceiling mounting the motor
- Setting travel limits and force
- Safety sensor alignment
- myQ WiFi setup during install
- Programming the remote/keypad
- Door not operating smoothly after install
Got your materials ready? Here's what to check first.
Before You Start
- Header/wall bracket not mounted solidly above the door
- Motor unit not centered/level on the ceiling
- Rail or trolley assembled incorrectly
- Travel limits or force not set
- Photo-eye sensors misaligned (LEDs not solid)
- Door arm attached to the wrong point
- myQ not on 2.4GHz WiFi
- Door out of balance before installing
Don't skip this step — it breaks everything if you do
WARNING: Belt must be properly tensioned to prevent slipping or premature wear. Over-tensioning can damage components.
Tools & Requirements
These tools will help you complete this fix.

Drill optional
DEWALT 20V MAX Cordless Drill and Impact Driver, Pow...

Level
9 Inch Torpedo Level Magnetic, Shock-Proof Small Lev...

Screwdriver
STREBITO 155 in 1 Electric Screwdriver Set, Small El...
As an Amazon Associate we earn from qualifying purchases.
Installation Steps
Check Door Balance and Clearance
Make sure garage door is properly balanced, check for minimum 2.5 inches of clearance above highest point of door travel, and verify door weight limits.
Assemble Rail and Belt System
Connect rail sections with provided brackets, install belt around drive pulley and idler pulley, make sure proper belt routing and initial tension.
Install Header Bracket
Mount header bracket to wall above garage door using appropriate fasteners for wall type, make sure bracket is level and securely attached.
Needed for this step
9 Inch Torpedo Level Magnetic, Shock-Proof Smal...
This helps complete the fix you are currently reading.
$6.99Mount Motor Unit
Install hanging brackets on ceiling, lift and secure motor unit to brackets, connect to header bracket, and make sure all connections are tight.
Adjust Belt Tension
Set proper belt tension using adjustment mechanism, belt should deflect 1/2 inch when pressed at center point between pulleys.
Install Safety Sensors
Mount sensors 4-6 inches from floor on both sides of door opening, align sensors, and connect low-voltage wiring to motor unit.
Set Travel Limits and Force
Adjust up and down travel limits using limit screws, set opening and closing force adjustments, and test automatic reversal features.
Program Controls and Test
Program wall console and remote controls, test all safety features, verify smooth operation, and adjust settings as needed.
Installation Tips
Still stuck? This is usually the deeper cause below.
Belt drive systems are quieter than chain drives. Proper belt tension is critical for smooth operation. Use torque specifications for all fasteners.
Before you go — these Chamberlain guides fix most remaining issues.
Most popular upgrades chosen by Chamberlain Belt Drive Garage Door Opener owners.

Chamberlain B6713T Smart Advanced Corner LED Lighting-myQ...

Chamberlain C2405 MYQ Smart Garage Door Opener, Chain Dri...

Chamberlain B4603T MYQ Smart Garage Door Opener, Ultra Qu...
As an Amazon Associate we earn from qualifying purchases.
Official Manufacturer Manual
Chamberlain provides official product documentation through their online manual rather than downloadable PDF. Access setup guides, troubleshooting steps, and product specifications for your Chamberlain Belt Drive Garage Door Opener.
Source: chamberlaingroup.com
Need More Help? Chamberlain Support
Note: The contact information below connects you directly to Chamberlain's official customer support team, not Trunetto. They can help with warranty claims, device replacements, and advanced technical issues.
Accessories owners commonly pair with Chamberlain Belt Drive Garage Door Opener.

Chamberlain CIGCWC Smartphone Connectivity Kit for Chambe...

Mounting Bracket myQ Chamberlain Garage Smart Hub,Smart G...

CHAMBERLAIN myQ Smart Garage Door Video Keypad with Wide-...
As an Amazon Associate we earn from qualifying purchases.