

How to Install Schlage Encode Smart WiFi Deadbolt
- Check Door Compatibility
- Remove Existing Deadbolt
- Install New Latch Assembly
- Install Exterior Deadbolt
- Connect Interior Assembly
- Install Batteries
Most users complete this in under 2 minutes
Overview
When a Schlage Schlage Encode Smart WiFi Deadbolt drops offline, it's almost always a stale network session rather than hardware failure — the steps below fix the majority of cases in under five minutes.
This guide covers the installation of the Schlage Encode Smart WiFi Deadbolt including door hardware replacement, WiFi connection through the Schlage Home app, and voice assistant pairing. The Encode connects directly to your home WiFi without a hub, making it one of the simplest smart lock installations available.
Why This Happens in Real Homes
Installing the Encode is a standard deadbolt swap plus a WiFi setup: the mechanical part is fitting the bolt with the right backset and orientation, seating both halves without pinching the cable, and aligning the strike so the bolt throws smoothly. The Encode auto-hands itself during setup, so you don't set orientation electronically by hand.
Get the bolt moving freely into an aligned strike before powering it, tightening the interior mount evenly so nothing binds. Then insert the batteries, let the lock auto-calibrate its handing, and run WiFi setup in the Schlage Home app on a 2.4GHz network. A smooth mechanical install is what makes the auto-handing and everyday operation reliable.
What's Included
- Installing the Encode WiFi deadbolt
- Door prep/backset questions
- Bolt binds after install
- Interior won't sit flush
- Cable routing questions
- WiFi setup after install
- Bolt misaligned to the strike
- Handing questions
Got your materials ready? Here's what to check first.
Before You Start
- Non-standard door prep
- Wrong backset setting
- Bolt orientation incorrect
- Tailpiece not engaging the lock body
- Cable pinched under the interior housing
- Strike not aligned
- Uneven/over-tight mounting screws
- Setup skipped (WiFi/handing) after install
Don't skip this step — it breaks everything if you do
WARNING: Follow local building codes. Test lock operation before final installation. Keep manual override key accessible.
Tools & Requirements
Installation Steps
Check Door Compatibility
Verify door thickness (1-3/8 to 1-3/4 inches), check door material compatibility, make sure proper door swing clearance, and confirm existing deadbolt hole alignment.
Remove Existing Deadbolt
Remove screws from interior deadbolt assembly, pull out lock cylinder and latch bolt, and clean debris from door holes.
Install New Latch Assembly
Insert Schlage latch into door edge hole, orient latch bolt properly for door swing direction, and secure with provided screws.
Install Exterior Deadbolt
Insert exterior deadbolt assembly through door hole, make sure proper alignment with latch assembly, and thread connecting screws through to interior side.
Connect Interior Assembly
Attach interior deadbolt assembly to exterior unit using connecting screws, make sure proper cable connections, and secure with interior mounting screws.
Install Batteries
Install 4 AA batteries in interior battery compartment, make sure correct polarity, and verify LED indicators show proper power status.
Program Initial Setup
Press and hold Program button until LED turns blue, enter 6-digit Programming Code found on instruction manual, and confirm with checkmark button.
Connect to WiFi
Download Schlage Home app, create account, follow in-app pairing instructions to connect lock to WiFi network, and test remote access.
Set User Access Codes
Using app or keypad, program 4-8 digit user codes, test each code for proper operation, and set up guest codes as needed.
Test All Functions
Test manual key operation, keypad entry, app control, auto-lock feature, and verify proper door alignment and smooth operation.
Installation Tips
Still stuck? This is usually the deeper cause below.
Ensure door is properly aligned before installation. Use level to check deadbolt alignment. Keep programming code secure.
Before you go — these Schlage guides fix most remaining issues.
Most popular upgrades chosen by Schlage Encode Smart WiFi Deadbolt owners.
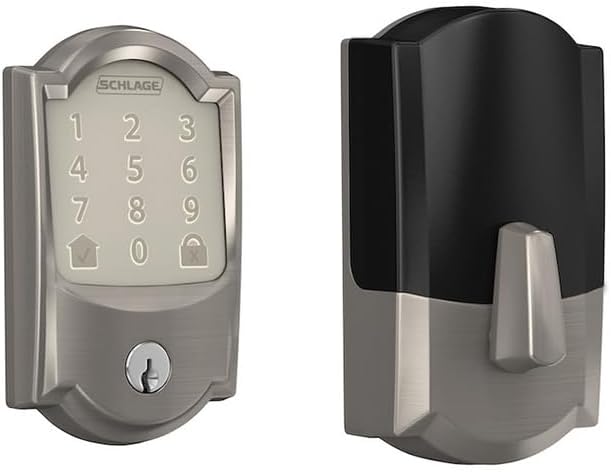
Schlage Residential BE489WBCCAM619 Camelot Encode Smart W...
Schlage Lock Company BE489WB CAM 716 Schlage Encode Smart...

Schlage Encode Smart WiFi Deadbolt Lock for Front Door - ...
As an Amazon Associate we earn from qualifying purchases.
Official Manufacturer Manual
If you need the complete manufacturer documentation for advanced setup, wiring diagrams, or detailed specifications, you can download the official manual below. The manual includes full technical instructions directly from the manufacturer and may help if your issue requires deeper troubleshooting.
Download the Official Schlage Encode Smart WiFi Deadbolt ManualSource: schlage.com
Need More Help? Schlage Support
Note: The contact information below connects you directly to Schlage's official customer support team, not Trunetto. They can help with warranty claims, device replacements, and advanced technical issues.
How Does Schlage Compare?
Before replacing your Schlage device, see how it stacks up against alternatives in our full comparison guides.


