
How to Install a SimpliSafe Entry Sensor on a Double-Hung Window
- Plan Placement
- Clean Surfaces
- Attach Sensor and Magnet
- Pair to Base Station
- Test in Test Mode
Most users complete this in under 15 minutes
Overview
Double-hung windows have two movable sashes, which changes how an entry sensor aligns. This guide covers sensor and magnet placement, surface prep, angle limits, and testing so the sensor triggers reliably on lower sash opens.
Why This Happens in Real Homes
Double-hung windows have two movable sashes, which changes how an entry sensor aligns. This guide covers sensor and magnet placement, surface prep, angle limits, and testing so the sensor triggers reliably on lower sash opens. In day-to-day use, this usually looks like Existing SimpliSafe system online; Window frame is clean and dry; Double-hung window with two sashes.
Most cases trace back to Gap between sensor and magnet too wide; Adhesive pressed on dusty surface; Sensor oriented parallel to wrong sash. The fix works best when you go step by step instead of changing multiple settings at once.
A practical order for this issue is: Plan Placement -> Clean Surfaces -> Attach Sensor and Magnet -> Pair to Base Station. After each step, test the exact behavior that was failing so you can confirm what actually solved it.
What's Included
- Existing SimpliSafe system online
- Window frame is clean and dry
- Double-hung window with two sashes
- Entry sensor and magnet in hand
- SimpliSafe app installed
- Mild temperature for adhesive curing
Got your materials ready? Here's what to check first.
Before You Start
- Gap between sensor and magnet too wide
- Adhesive pressed on dusty surface
- Sensor oriented parallel to wrong sash
- Reed switch not aligned with magnet
- Cold temperatures weaken first bond
- Test triggered before system in alarm mode
Don't skip this step — it breaks everything if you do
Do not mount sensors where sun hits them directly all day. UV exposure shortens sensor battery and degrades adhesive faster.
Tools & Requirements
These tools will help you complete this fix.

microfiber cloth
BELLEMOND「Samurai Cloth」Japanese Microfiber Cleaning...

isopropyl alcohol
ForPro Professional Collection 99% Isopropyl Alcohol...
As an Amazon Associate we earn from qualifying purchases.
Installation Steps
Plan Placement
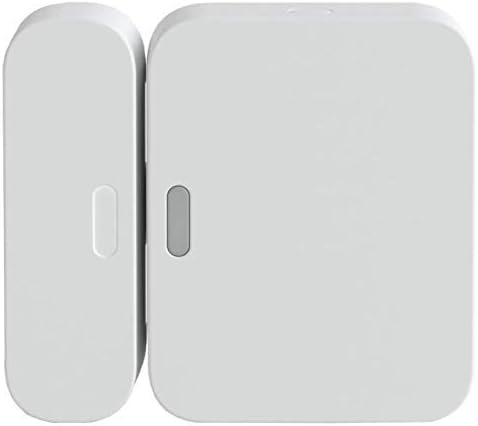
Attach the sensor to the stationary window frame beside the lower sash. Attach the magnet to the top edge of the movable lower sash. This orientation detects the sash rising during an intrusion attempt. Skipping this planning leads to sensors that fail to detect opens.
Clean Surfaces
Use isopropyl alcohol and a soft cloth to clean both the frame and sash where adhesive will sit. Dust and oils keep the included 3M adhesive from bonding fully. Allow to dry for a minute before peeling the adhesive backing on either the sensor or magnet.
Needed for this step
BELLEMOND「Samurai Cloth」Japanese Microfiber Cle...
This helps complete the fix you are currently reading.
$18.99Attach Sensor and Magnet
Peel adhesive on the sensor and firmly press onto the frame for 30 seconds. Attach the magnet to the lower sash with dots facing dots. Make sure the gap between sensor and magnet is less than 1 inch when the sash is fully closed to guarantee reliable triggering.
Pair to Base Station
Open the SimpliSafe app, tap Add Device, and select Entry Sensor. Follow pairing prompts. Rename the sensor to match the window location, such as Office Window. Clear naming helps during alarm events when you need to know exactly which window triggered.
Test in Test Mode
Place the system in test mode from the app. Open the lower sash at least four inches. The sensor should beep or show open in the app. Close and confirm closed reading. If the sensor does not trigger, recheck magnet alignment and the sash-to-frame gap.
Installation Tips
Still stuck? This is usually the deeper cause below.
Label both adhesive strips with install date. Expected replacement is 2-3 years for adhesive that has survived temperature swings.
Before you go — these SimpliSafe guides fix most remaining issues.
Most popular upgrades chosen by SimpliSafe Entry Sensor owners.
As an Amazon Associate we earn from qualifying purchases.
Official Manufacturer Manual
SimpliSafe provides official product documentation through their online manual rather than downloadable PDF. Access setup guides, troubleshooting steps, and product specifications for your SimpliSafe Entry Sensor.
Source: simplisafe.com
Need More Help? SimpliSafe Support
Note: The contact information below connects you directly to SimpliSafe's official customer support team, not Trunetto. They can help with warranty claims, device replacements, and advanced technical issues.
How Does SimpliSafe Compare?
Before replacing your SimpliSafe device, see how it stacks up against alternatives in our full comparison guides.
Accessories owners commonly pair with SimpliSafe Entry Sensor.

Blink Mini - Compact indoor plug-in smart security camera...
Blink Mini - Compact indoor plug-in smart security camera...

Blink Mini - Compact indoor plug-in smart security camera...
As an Amazon Associate we earn from qualifying purchases.
