

Why Won't My SimpliSafe Sensor Detect When the Door Opens?
- Sensor gap too large
- Magnet positioned wrong
- Sensor battery dead
Problem Description
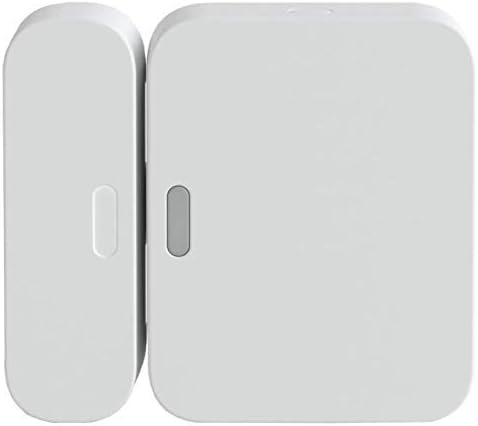
Your SimpliSafe entry sensor (door/window sensor) is not detecting when the door or window opens. Check the gap between the sensor (larger piece mounted on the frame) and the magnet (smaller piece mounted on the door). When the door is closed, the sensor and magnet must be within 1 inch of each other with the flat sides facing each other.
Why This Happens in Real Homes
When a SimpliSafe entry sensor stops detecting opens and closes entirely, the first thing to check is the CR-2032 battery. SimpliSafe says batteries last 3 to 5 years, but in practice sensors on frequently used doors burn through batteries in about 2 years because every open-close cycle triggers an RF transmission back to the base station on 433 MHz. Pop the sensor cover off — it slides toward the rounded end — and replace the coin cell. If a fresh battery does not fix it, the reed switch inside may have failed. This is rare but happens on sensors that get slammed repeatedly on heavy doors. You can test by holding a magnet right against the sensor body — if the app still shows no state change, the sensor hardware is dead and needs replacement.
Symptoms
- Door opens but no alert
- Sensor shows open when closed
- Alarm doesn't trigger on entry
- Sensor fell off door
- Constant false open alerts
Recognize these? Here's what usually causes it.
Common Causes
- Sensor gap too large
- Magnet positioned wrong
- Sensor battery dead
- Sensor not paired
- Adhesive failed
Most fixes happen in the first 3 steps.
For garage doors, use SimpliSafe's garage door sensor instead - regular entry sensors can't handle the vibration.
Tools & Requirements
These tools will help you complete this fix.
As an Amazon Associate we earn from qualifying purchases.
Step-by-Step Solution
Check the gap between sensor and magnet
The SimpliSafe entry sensor and its magnet must be within about 1 inch of each other when the door or window is closed (2 inches for the Extended model). If the gap is wider, the sensor cannot detect the magnet and shows as permanently open. Measure the gap when closed. If it is too wide, reposition the magnet closer to the sensor using fresh adhesive.
Check for metal interference
Mounting the entry sensor on a metal surface (steel door, metal window frame, aluminum door frame) can interfere with the magnetic detection. The metal acts as a magnetic shield, reducing the effective range. Place a spacer between the sensor and the metal surface — a piece of cardboard, plastic, or the included adhesive mount provides enough standoff to restore detection.
Replace the battery
The entry sensor uses one CR-2032 lithium coin cell battery with a life of up to 5 years. When the battery is low, the sensor may stop communicating or report incorrect states. Use a coin or flathead screwdriver to twist the back cover off. Insert a new CR-2032 with the positive side facing up. After replacement, check the app — the sensor should reconnect within a few minutes.

Needed for this step
Duracell Coppertop Double AA Batteries with Pow...
This helps complete the fix you are currently reading.
$6.96Re-enroll the sensor
If the battery is fresh and placement is correct but the sensor still does not detect, remove it from the SimpliSafe app and re-add it. Go to Devices, select the sensor, remove it, then add a new sensor. During enrollment, open and close the door to confirm the sensor registers both open and closed states in the app.
Close doors and windows slowly
If the sensor sometimes misses a close event (shows open when the door is closed), the door may be closing too quickly for the sensor to register the state change. Close the door at normal speed and check if the app updates. Some SimpliSafe entry sensors have a brief sampling interval, and a very fast slam can be missed. If this happens consistently, the sensor firmware may need updating through the base station.
Quick Solutions
Still having issues? This is usually the deeper cause below.
If the sensor still misses events after repositioning, check whether a scheduled 'home' or 'away' mode is overriding the sensitivity setting silently.
Entry sensors should be mounted on the door frame (stationary side), with magnet on the door (moving side). **Product Intelligence:** - CR-2032 battery (2-3yr) - Magnet gap: up to 1 inch
Battery-related failures are almost always flagged too late — the device degrades silently for days before the app catches up to what's actually happening.
- Sensor gap too large
- Magnet positioned wrong
- Sensor battery dead
- Sensor not paired
- Adhesive failed
Before you go — try one of these (they fix most cases).
Most popular upgrades chosen by SimpliSafe Entry Sensor owners.
As an Amazon Associate we earn from qualifying purchases.
Official Manufacturer Manual
SimpliSafe provides official product documentation through their online manual rather than downloadable PDF. Access setup guides, troubleshooting steps, and product specifications for your SimpliSafe Entry Sensor.
Source: simplisafe.com
Need More Help? SimpliSafe Support
Note: The contact information below connects you directly to SimpliSafe's official customer support team, not Trunetto. They can help with warranty claims, device replacements, and advanced technical issues.
How Does SimpliSafe Compare?
Before replacing your SimpliSafe device, see how it stacks up against alternatives in our full comparison guides.
Accessories owners commonly pair with SimpliSafe Entry Sensor.

SimpliSafe 8 Piece Wireless Home Security System

SimpliSafe 9 Piece Wireless Home Security System

SimpliSafe 12 Piece Wireless Home Security System w/HD Ca...
As an Amazon Associate we earn from qualifying purchases.
