How to Install a Lutron Caseta Claro Smart Switch
- Kill Power
- Remove Old Switch
- Wire Claro
- Mount Switch
- Pair to Caseta Hub
Most users complete this in under 40 minutes
Overview
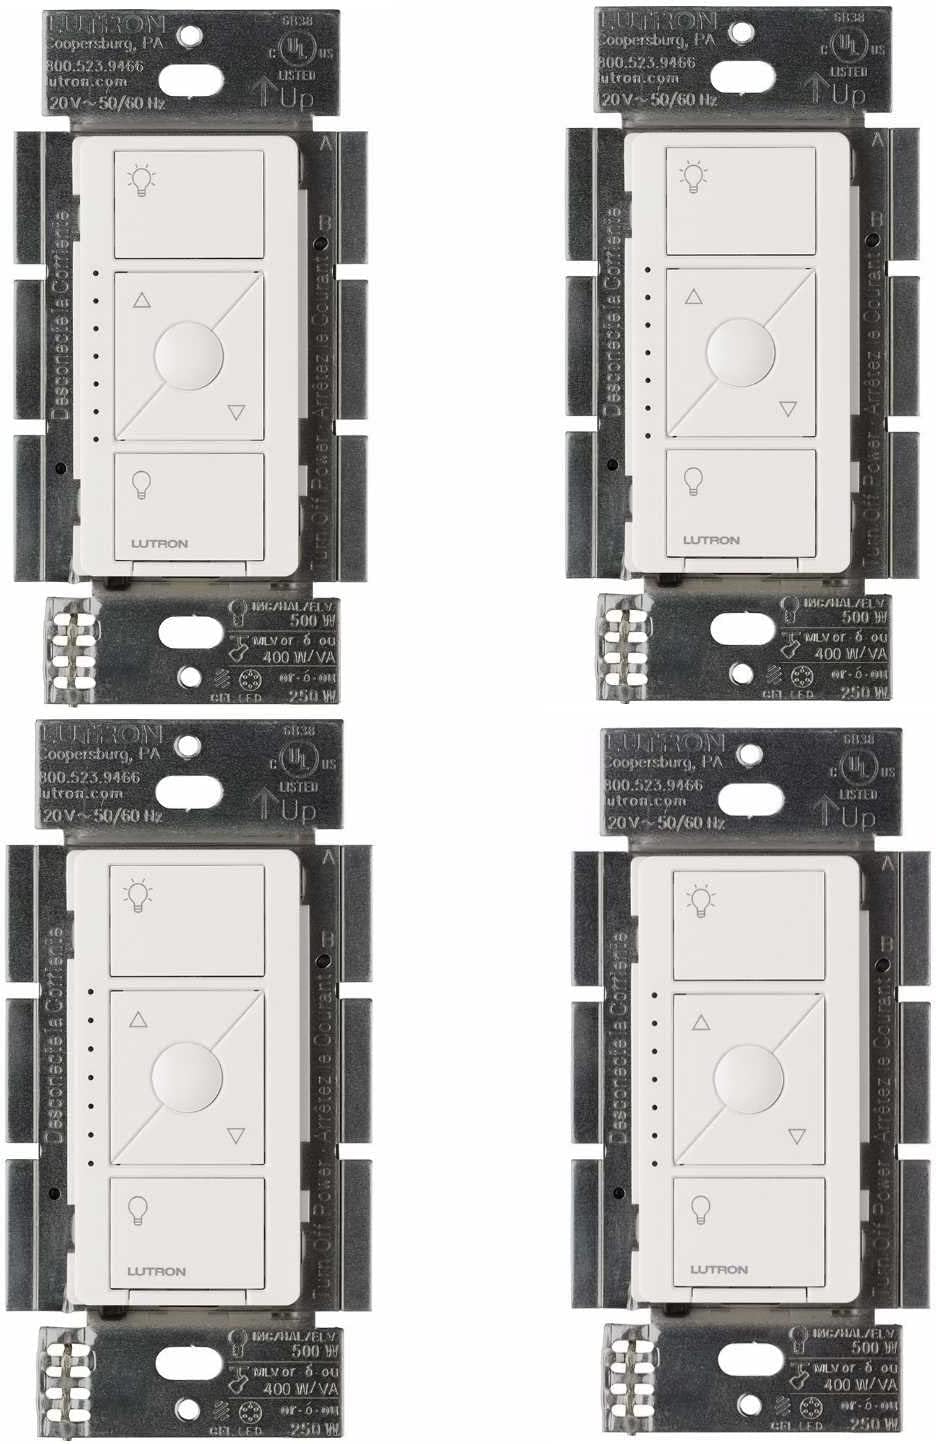
The Caseta Claro replaces a standard on-off switch with a refined paddle and Caseta compatibility. This guide wires the switch safely and pairs it to a Caseta Smart Hub.
Why This Happens in Real Homes
The Caseta Claro replaces a standard on-off switch with a refined paddle and Caseta compatibility. This guide wires the switch safely and pairs it to a Caseta Smart Hub. In day-to-day use, this usually looks like Caseta Smart Hub installed; Existing single-pole or 3-way switch; Neutral wire in box.
Most cases trace back to No neutral in older box; Wires mixed up during swap; Load and line reversed. The fix works best when you go step by step instead of changing multiple settings at once.
A practical order for this issue is: Kill Power -> Remove Old Switch -> Wire Claro -> Mount Switch. After each step, test the exact behavior that was failing so you can confirm what actually solved it.
What's Included
- Caseta Smart Hub installed
- Existing single-pole or 3-way switch
- Neutral wire in box
- Caseta app installed
- Breaker labeled
- Voltage tester
Got your materials ready? Here's what to check first.
Before You Start
- No neutral in older box
- Wires mixed up during swap
- Load and line reversed
- Hub offline during pair
- Box crowded and overheats
- Screw terminals not torqued
Don't skip this step — it breaks everything if you do
Do not install Caseta without a neutral. Claro requires neutral and will not operate safely in older boxes that lack one.
Tools & Requirements
These tools will help you complete this fix.

Non-contact voltage tester
Neoteck Non-Contact AC Voltage Tester Pen, AC 12-100...

Phillips screwdriver
Klein Tools 85076 Screwdriver Set, Made in USA, Slot...
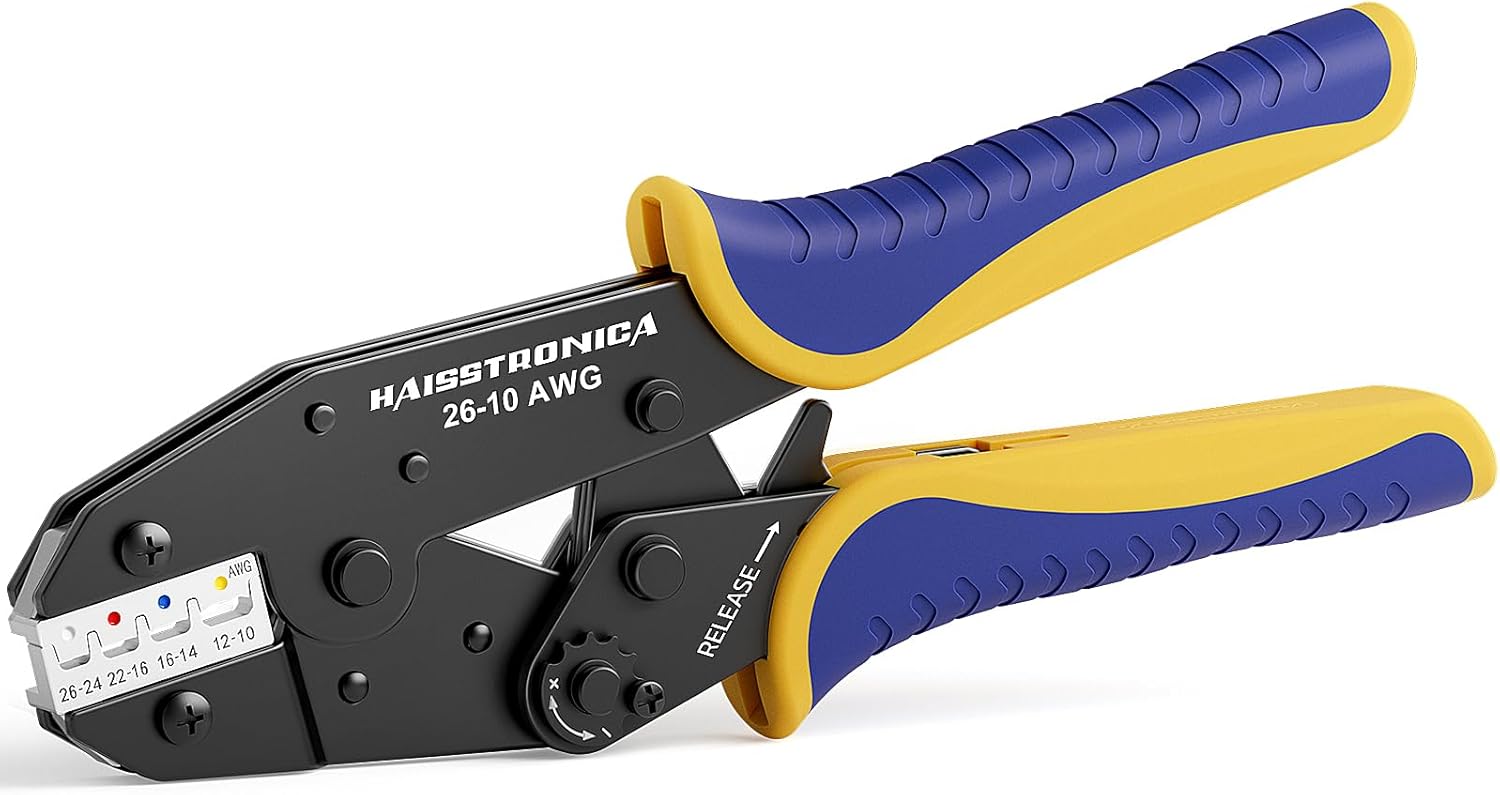
Wire connectors
haisstronica Crimping Tool For Heat Shrink Connector...

Wire strippers
1188-Piece Ferrule Crimping & Stripping Tool Kit, AW...
As an Amazon Associate we earn from qualifying purchases.
Installation Steps
Kill Power
Turn off the breaker for the switch circuit. Test with a non-contact voltage tester at every wire in the box before touching anything.
Needed for this step
Neoteck Non-Contact AC Voltage Tester Pen, AC 1...
This helps complete the fix you are currently reading.
$9.59Remove Old Switch
Unscrew the old switch. Label line, load, neutral, and ground wires with painters tape. Good labeling avoids mistakes when wiring the Claro.
Wire Claro
Connect line, load, neutral, and ground to the Claro terminals per the diagram. Tighten terminals to spec. Gently fold wires into the box.
Needed for this step
haisstronica Crimping Tool For Heat Shrink Conn...
This helps complete the fix you are currently reading.
$24.99Mount Switch
Screw the Claro into the box. Attach the wall plate. Restore breaker power and confirm the Claro LED glows when you press the paddle.
Pair to Caseta Hub
Open the Caseta app and add device. Follow prompts to pair the Claro with the hub. Name the switch clearly by room and fixture before exiting.
Installation Tips
Still stuck? This is usually the deeper cause below.
Photograph the existing wiring before removing. Photos are a reliable reference if a wire color does not match a guide exactly.
Before you go — these Lutron guides fix most remaining issues.
Most popular upgrades chosen by Lutron Caseta Claro owners.

Lutron Diva Smart Dimmer Switch with Wallplate and Pico S...

Lutron Caseta Deluxe Smart Dimmer Switch Kit, Compatible ...

Lutron Caséta Motion Sensor, Occupancy/Multi-Location, wi...
As an Amazon Associate we earn from qualifying purchases.
Official Manufacturer Manual
Lutron provides official product documentation through their online manual rather than downloadable PDF. Access setup guides, troubleshooting steps, and product specifications for your Lutron Caseta Claro.
Source: support.lutron.com
Need More Help? Lutron Support
Note: The contact information below connects you directly to Lutron's official customer support team, not Trunetto. They can help with warranty claims, device replacements, and advanced technical issues.
Accessories owners commonly pair with Lutron Caseta Claro.

Lutron Caseta Smart Lighting Smart Hub Repeater, Expands ...

Lutron Pico Remote for Audio, Works with Sonos (Caseta Sm...

LXLO Remote Wallplate Bracket, Perfectly Compatible with ...
As an Amazon Associate we earn from qualifying purchases.